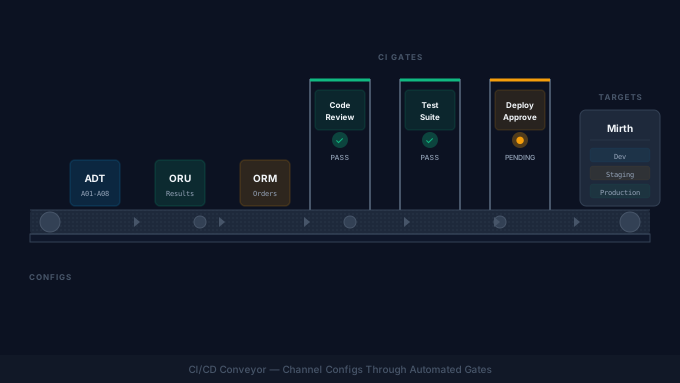
We’ve shown in previous posts that mirthSync can be used to move code between different Mirth Connect systems and can also be used in conjunction with Git for tracking code/config changes. In this post we’ll dive into implementing a simple CI/CD pipeline by wiring together Github Actions, mirthSync, and multiple Mirth Connect deployments. This will show how changes can be implemented, tracked, and automatically deployed to a staging environment from a development environment.
Updated October 2026 for MirthSync 3.8.0. The workflow and commands below are current. The mirthsync-ci sample repository this post was built around was last updated in 2021: it pins mirthSync 2.1.1, whose folder layout predates version 3, and GitHub actions versions that no longer run. Use the workflow in this post rather than copying the repository’s. For a fuller pipeline with pull-request review and promotion across dev, staging, and production, see Mirth Connect & OIE CI/CD with MirthSync.
Set up a Git repository
The first step in implementing CI/CD for Mirth is to create a repository for tracking changes to your mirth code and configuration. We’ll be using Github with Github actions for this example but the same basic approach can be used for any combination of source control and CI/CD systems.
You can check out the original end-result of this process in our mirthsync-ci repository on GitHub (see the note above about its age).
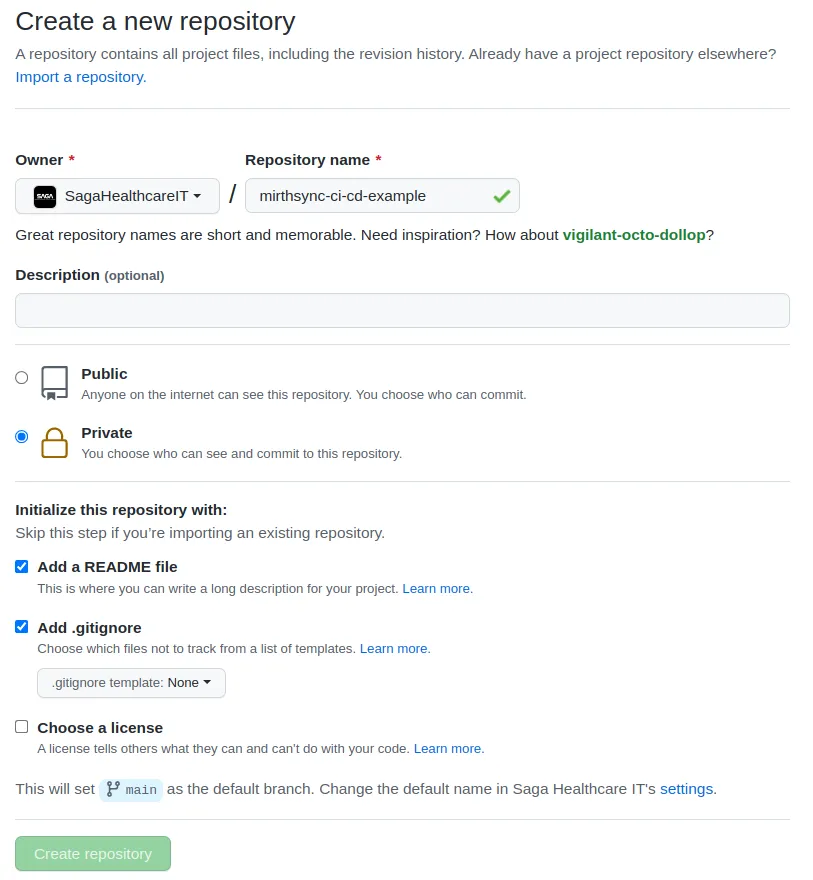
First we’ll create our new repository for tracking changes on Github. Go ahead and initialize the repository with a README and a .gitignore file.
Fetch and commit our Mirth code
Now that we have a minimal repository on Github we’ll need to populate it with our Mirth code and some supplementary files to assist with our CI/CD workflow.
Note: The following steps are performed on a Linux environment but the same concepts apply to Windows environments as well (though you may need to adjust some files and steps accordingly).
Let’s open a terminal and get a local checkout of our newly created Git repository. You can get the repository url from Github.
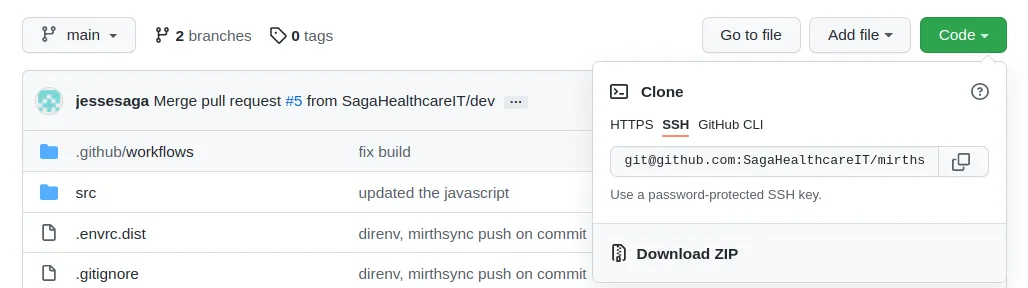
git clone git@github.com:SagaHealthcareIT/mirthsync-ci.git Cloning into 'mirthsync-ci'... remote: Enumerating objects: 223, done. remote: Counting objects: 100% (223/223), done. remote: Compressing objects: 100% (124/124), done. remote: Total 223 (delta 86), reused 143 (delta 55), pack-reused 0 Receiving objects: 100% (223/223), 45.43 KiB | 802.00 KiB/s, done. Resolving deltas: 100% (86/86), done.Ok, we have our local checkout of the repository. Let’s move onto populating the repository with a minimal set of files and directories for working with Mirthsync. Once you’re finished you should end up with a directory structure that looks something like the tree below.
The src directory is the ‘target’ for our mirthSync actions. It contains Mirth code and configuration split out into an intuitive structure of XML and code files that can be opened with a normal text editor and stored within a source control repository. Since mirthSync 3, the JavaScript in channels, code templates, and global scripts is pulled out into separate .js files, and channels outside any group live in Default Group. The tree above is trimmed.
Other noteworthy files are the Makefile, mirthsync.yml file, and .envrc. The Makefile isn’t strictly necessary but is used as a convenient way to script out various actions that are useful while working with Mirth and mirthSync. The mirthsync.yml file contains the Github actions configuration and steps. The .envrc.dist file is a template that can be copied to an actual .envrc file for use with ‘direnv’ (an open source tool for associating environment variables with directories). Like the Makefile - the direnv configuration is not necessary and is there for convenience.
└── mirthsync-ci ├── .envrc.dist ├── .github │ └── workflows │ └── mirthsync.yml ├── .gitignore ├── Makefile ├── README.md └── src ├── Alerts │ └── test alert.xml ├── Channels │ ├── Default Group │ │ ├── Http 3080 │ │ │ ├── DeployScript.js │ │ │ └── destinationConnector-Destination Hello.js │ │ └── Http 3080.xml │ └── This is a group │ ├── Http Hello2 3081 │ │ └── destinationConnector-Hello world 2-transformer-step-0.js │ ├── Http Hello2 3081.xml │ └── index.xml ├── CodeTemplates │ └── Library 1 │ ├── Template 1 │ │ └── Template 1.js │ ├── Template 1.xml │ └── index.xml ├── ConfigurationMap.xml ├── GlobalScripts │ ├── globalScripts │ │ └── Deploy.js │ └── globalScripts.xml └── Resources.xmlTo create the src directory you’ll need mirthSync available on your command line. In my case, I place the mirthsync.sh script (in the release’s bin folder) on my path. You can also invoke mirthSync directly by running ‘java -jar’ on the jar in the release’s lib folder, or install it with npm install -g @saga-it/mirthsync. The -i flag below ignores the self-signed certificate on my local server.
mirthsync.sh -s https://localhost:8443/api -u admin -p admin -i -t src pull/usr/bin/javafound java executable in PATHversion 11.0.13Authenticating to server at https://localhost:8443/api as adminDownloading from https://localhost:8443/api/server/configurationMap to src/ File: src//ConfigurationMap.xml.........Downloading from https://localhost:8443/api/alerts to src/Alerts File: src/Alerts/test alert.xml File: src/Alerts/test alerts 2.xmlFinished!The preceding command and output is used to ‘pull’ Mirth code and configuration from my local development environment into the ‘src’ directory. Descriptions for the various command line switches can be seen with a ‘mirthsync.sh –help’ command. Now that you have a src directory go ahead and commit the code and push it to Github.
Configure Github Actions
Now that we have our Mirth code in source control - let’s add a Github actions workflow at .github/workflows/mirthsync.yml:
name: Mirthsync CI/CD
on:  push:    branches: [ main ]
# Deploy to staging one run at a time.concurrency:  group: mirthsync-staging  cancel-in-progress: false
env:  MIRTHSYNC_VERSION: 3.8.0  MIRTHSYNC_SHA256: 04fc88421daf483f0b99770d7a43951e3e6e369f3e0e6531cfe70d96f9120403
jobs:  deploy-staging:    runs-on: ubuntu-latest    timeout-minutes: 15    steps:      - uses: actions/checkout@v7
      - uses: actions/setup-java@v6        with:          distribution: temurin          java-version: '21'
      - name: Install mirthSync        run: |          curl -fsSL -O "https://github.com/SagaHealthcareIT/mirthsync/releases/download/${MIRTHSYNC_VERSION}/mirthsync-${MIRTHSYNC_VERSION}.tar.gz"          echo "${MIRTHSYNC_SHA256}  mirthsync-${MIRTHSYNC_VERSION}.tar.gz" | sha256sum -c          tar -xzf "mirthsync-${MIRTHSYNC_VERSION}.tar.gz" -C "$RUNNER_TEMP"          echo "$RUNNER_TEMP/mirthsync-${MIRTHSYNC_VERSION}/bin" >> "$GITHUB_PATH"
      - name: mirthSync push        env:          STAGE_URL: ${{ secrets.STAGE_URL }}          STAGE_USER: ${{ secrets.STAGE_USER }}          MIRTHSYNC_PASSWORD: ${{ secrets.STAGE_PASS }}        run: >          mirthsync.sh -s "$STAGE_URL" -u "$STAGE_USER"          -t src --include-configuration-map -f          --deploy-changed --deploy-new push
This YML file specifies that it is meant for the ‘main’ branch in Git. It won’t run on code pushes to other branches. The goal is to allow commits to a ‘dev’ branch. When a developer is satisfied with their changes they can merge the changes to ‘main’. This will kick off the workflow. The next steps in the workflow install Java, download a pinned mirthSync release and check it against its published SHA-256, and then push the code changes in the ‘src’ folder to our staging server. The concurrency group keeps two merges from pushing to staging at once, and timeout-minutes stops a hung connection from blocking the runs queued behind it (mirthSync sets no HTTP timeouts of its own).
The push step says use the url and username from the environment and push the contents of src to the remote server. A few of the options deserve a word:
- The password never appears on the command line. mirthSync reads it from the
MIRTHSYNC_PASSWORDenvironment variable, so it stays out of process listings and logs. --include-configuration-mapincludes the configuration map, which is not pushed by default.-foverwrites everything on the server with what is insrc, including anything edited directly on staging. Keep it for this push. Without it, channels edited on staging are still overwritten, while code templates, code template libraries and channel groups are refused whenever their revision on staging differs from the one insrc. Sincesrccarries your development server’s revision numbers, that happens on ordinary runs, and the job fails.--deploy-changed --deploy-newdeploys the pushed channels. A push on its own only saves channels; without a deploy flag nothing goes live until someone deploys in the Administrator. A push re-saves every channel it includes, which bumps each channel’s revision, so after a full push this redeploys every channel, and--deploy-newcovers channels that were never deployed. It also deploys any staging channel with undeployed edits made in the Administrator. We use it rather than--deploy-allbecause through mirthSync 3.8.0 only this combination exits non-zero when a channel fails to deploy, so a failed deploy fails the job instead of leaving it green.- A push never deletes. Channels, templates, and alerts you remove from
srcstay on staging until you remove them there. - If staging uses a self-signed certificate, add
-i.
In our original example the push ran via a Makefile target. That isn’t necessary since mirthSync doesn’t require Make, but it’s convenient when you run push/pull commands frequently during development, and the same command works there.
In the case of our Github Actions workflow - we specify these values in the repository ‘Secrets’ configuration to prevent disclosure of sensitive info in our setup and workflow output. For local development we rely on ‘direnv’ and our local .envrc file to configure appropriate environment variables for the local command line.
At this time, go ahead and configure your Secrets using the Github UI repository. In the sample repository the secrets looks like this.
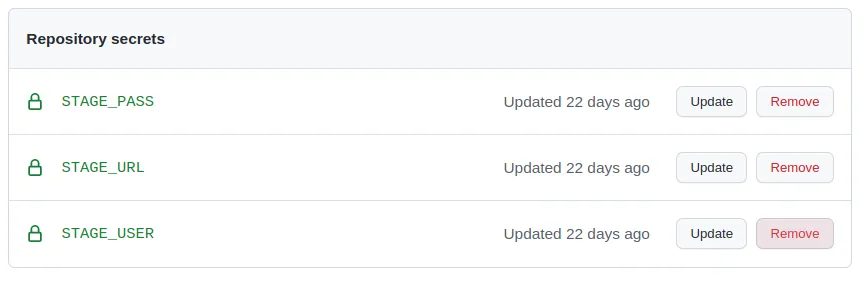
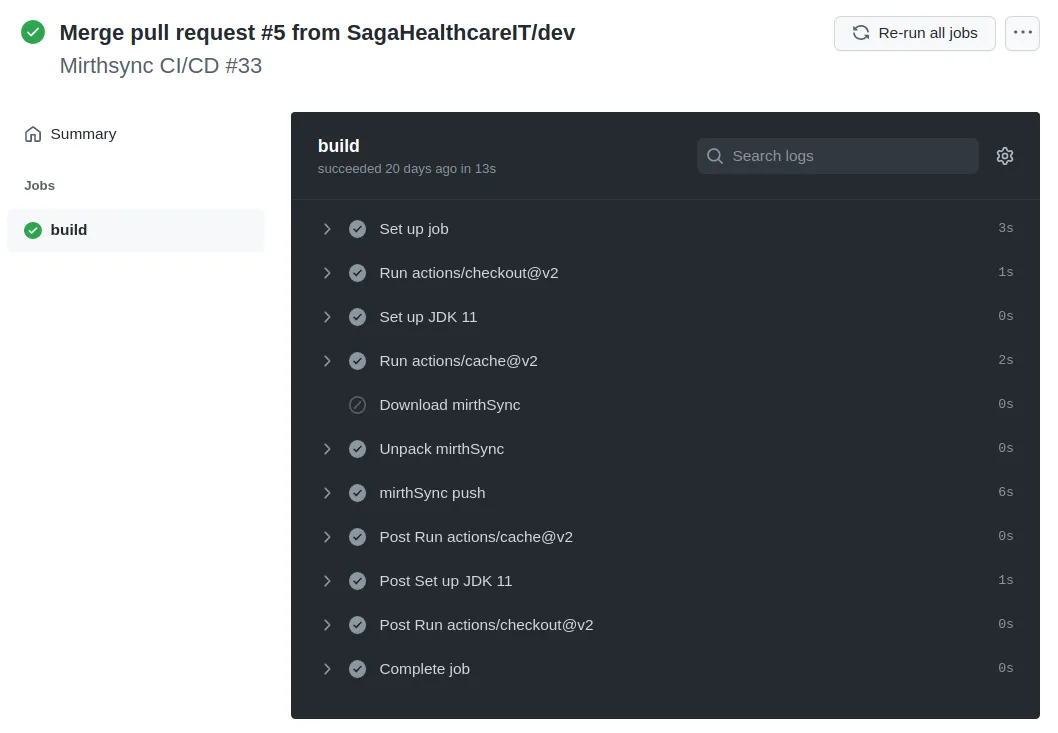
With our secrets configured, we can go ahead and commit and push our github actions mirthsync.yml file. If everything is configured correctly you should see your workflow kick off and deploy the repository code to your remote ‘staging’ Mirth environment. Here’s a view of a recent workflow run in our sample repository…
Closing Thoughts
At this point it would be good to show a full development workflow using mirthSync from dev changes/testing to a pull-request/review cycle and eventually deployment to production, but this post is already getting a little on the long side. That workflow is covered in Mirth Connect & OIE CI/CD with MirthSync, and the CI/CD setup guide has equivalent pipelines for GitLab CI, Jenkins, and Azure DevOps. If you are new to mirthSync, start with Getting Started with MirthSync and Using MirthSync with Git.