
Sending HL7 Messages to AWS SQS with Mirth Connect: Tutorial
April 8, 2024
Introduction
In healthcare data management, ensuring secure and efficient communication between disparate systems is crucial. Mirth Connect, an open-source healthcare interface engine, plays a pivotal role in this ecosystem, enabling the seamless exchange of health information. This guide dives into the specifics of using Mirth Connect to transmit HL7 (Health Level Seven) messages, a standard for exchanging health information, to Amazon Web Services (AWS) Simple Queue Service (SQS).
With AWS SQS, healthcare organizations can leverage the power of cloud services to manage message queues, enhancing scalability and reliability. We’ll guide you through the step-by-step process of configuring Mirth Connect, from setting up your channel to integrating with AWS SQS, ensuring a secure and efficient setup. Whether you’re new to Mirth Connect or looking to expand its capabilities within your healthcare IT infrastructure, this post provides the essential knowledge to bridge the gap between healthcare data standards and cloud-based message queuing services.
Step-by-Step Instructions
Create a Queue in AWS SQS
Creating an Amazon SQS (Simple Queue Service) queue involves a series of steps that you can perform through the AWS Management Console, AWS CLI, or AWS SDKs. Below, I’ll guide you through the process using the AWS Management Console.
Navigate to SQS: Once logged in, find the “Services” menu and select “SQS” under the “Application Integration” section or use the search bar to find SQS.
Create a New Queue: Click the “Create queue” button. You will have the option to create a “Standard queue” or a “FIFO queue”. Standard queues offer maximum throughput, best-effort ordering, and at-least-once delivery. FIFO queues are designed to guarantee that messages are processed exactly once, in the exact order that they are sent.
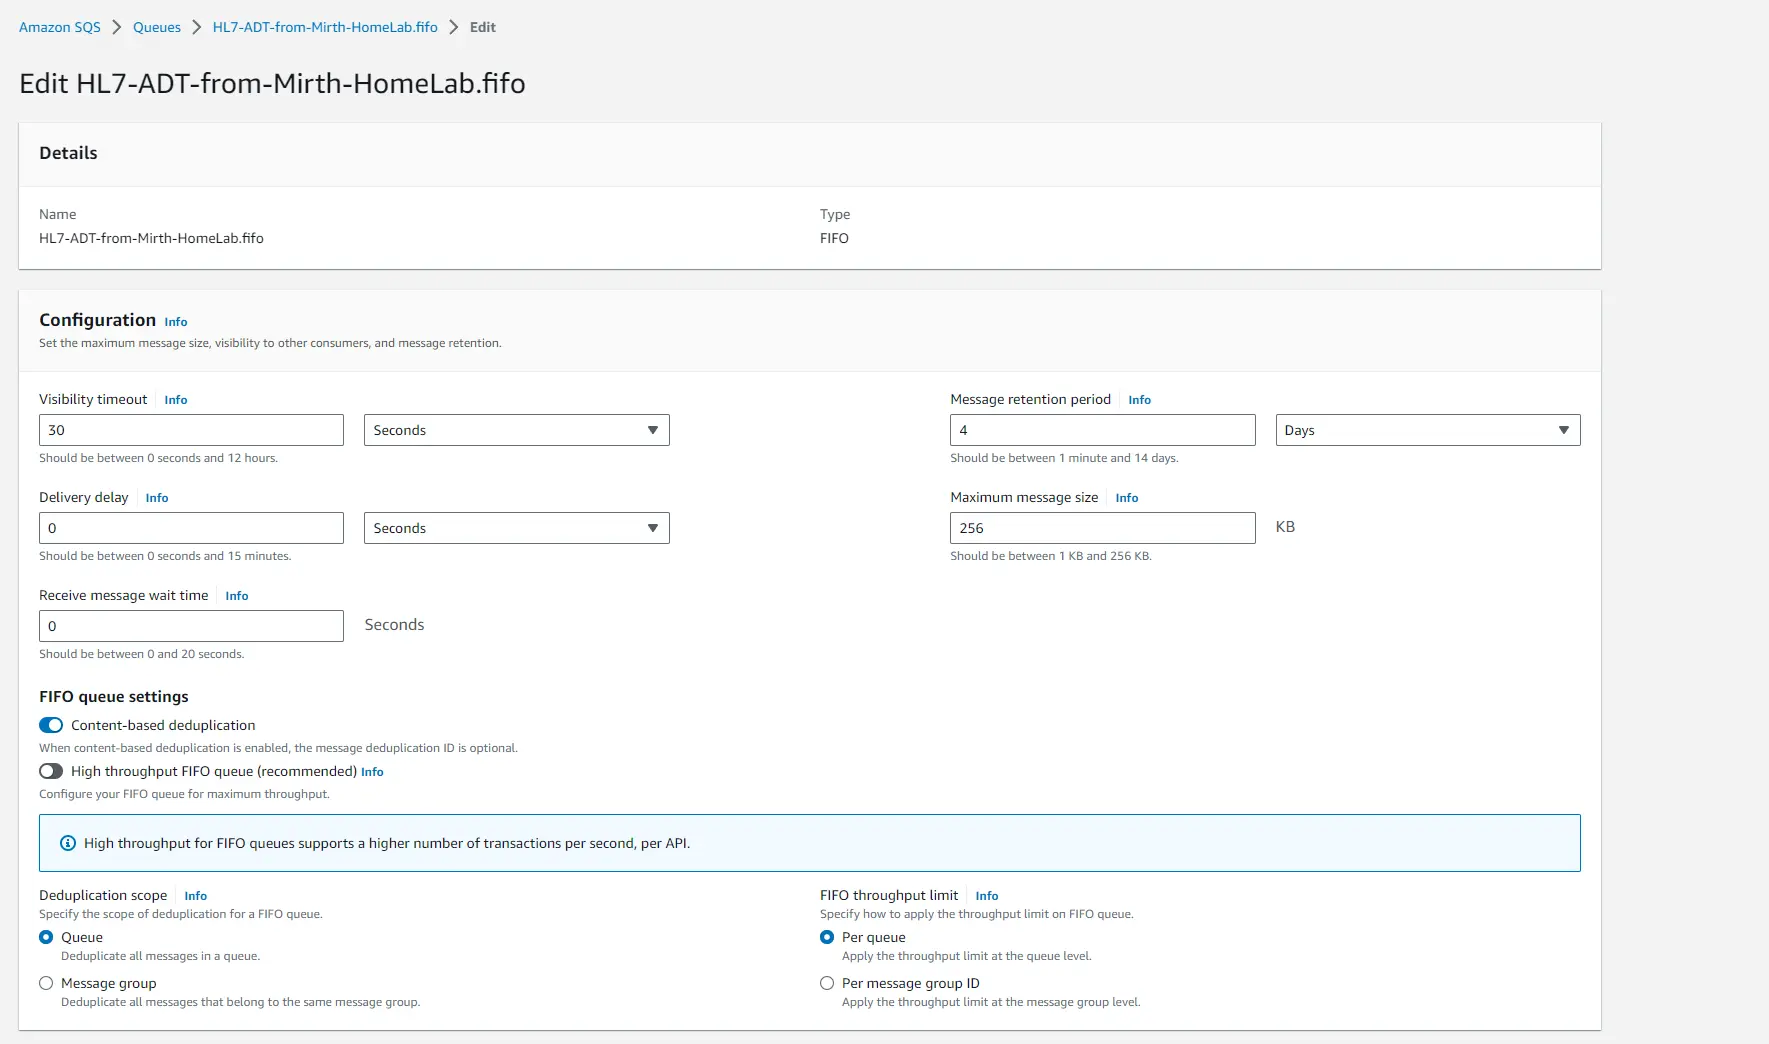
Configure Your Queue: Fill in the “Name” for your queue and configure additional settings as needed, such as message retention period, delivery delay, maximum message size, etc. Each setting has a tooltip explaining its function. For a standard queue, most default configurations work for basic needs. For a FIFO queue, you’ll need to provide a .fifo suffix in the queue name.
Set Permissions (Optional): You can adjust the queue’s permissions to allow other AWS accounts to send messages to the queue.
Finish the New Queue: Click the “Create queue” button at the bottom of the page. That’s it! Your SQS queue is now ready to use.
Setup User Account IAM Policy
To ensure that your user account has the necessary Amazon Simple Queue Service (SQS) read/write permissions in AWS Identity and Access Management (IAM), you will need to attach an IAM policy to the user account that grants these permissions. Below is a step-by-step guide to create and attach a policy for SQS read/write access:
Navigate to the IAM Dashboard: In the AWS Management Console, find and select “IAM” under the Services menu to open the IAM dashboard.
Create a New Policy:
- In the IAM dashboard, select “Policies” from the navigation pane on the left side.
- Click the “Create policy” button.
- Choose the JSON tab to manually enter the policy.
Enter the Policy JSON: In the JSON tab, you can use the following policy document as a template to grant SQS read/write access. Remember to replace “Resource”: “arn:aws:sqs:::YourQueueName” with the actual ARN of your SQS queue, or use “Resource”: “*” to apply the policy to all SQS queues under your account.
{
    "Version": "2012-10-17",
        "Statement": [{
                "Effect": "Allow",
                "Action": [
                    "sqs:SendMessage",
                    "sqs:ReceiveMessage",
                    "sqs:DeleteMessage",
                    "sqs:GetQueueAttributes",
                    "sqs:GetQueueUrl"
                ],
                "Resource": "arn:aws:sqs:*:*:YourQueueName"
        }]
}
Review and Name the Policy:
- After entering the JSON policy, click “Review policy.”
- Give your policy a name and description that clearly identifies its purpose, e.g., SQSReadWriteAccess.
- Click “Create policy” to finalize.
Attach the Policy to the User Account:
- Navigate to “Users” in the IAM dashboard and select the user account you want to grant SQS read/write access to.
- In the “Permissions” tab for the user, click “Add permissions.”
- Choose “Attach existing policies directly” and search for the policy you created by name.
- Select the policy and click “Next: Review” then “Add permissions.”
Install the AWS Java SDK Core library in Mirth Connect
- Download the AWS Java SDK Core from GitHub: https://github.com/aws/aws-sdk-java-v2/releases/latest
- Upload the jar into your custom-lib folder and restart Mirth service
Install our sample channel from GitHub
- Download our sample channel xml from our GitHub repository: https://github.com/SagaHealthcareIT/MirthHL72SQS/blob/main/HL72SQS_channel.xml
- Import the new channel into Mirth Connect.
- Configure your new channel. Replace your AWS access key and secret located in the source transformer:
var sqsKey = "you key here"; // your aws access key var sqsSecret = "your secret here"; // your aws access secret var sqsRegion = "us-east-1"; // set your region var sqsMessageGroupId = "test"; // this is required for FIFO queuing - If you created a non FIFO AWS SQS Queue you can remove the line below
.withMessageGroupId(sqsMessageGroupId) - Deploy the new channel
Testing & Validation
Let’s test out the new workflow by sending a sample HL7 message from Mirth Connect and then verifying it via the AWS Console.
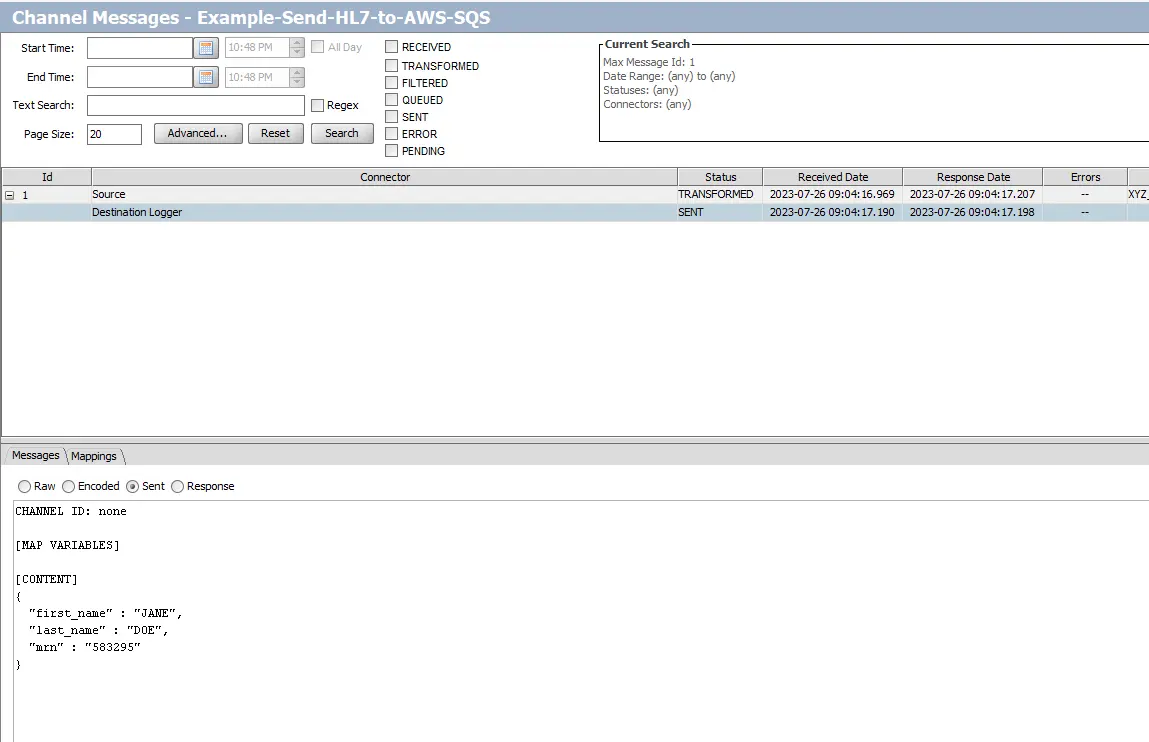
- Use the “Send Message” feature in the Mirth Connect Administrator Dashboard to send a sample message to AWS.
- Check the channel messages:
- Now let’s check our new SQS queue:
- Click “Send and receive messages” in the queue screen at the top right.
- Click “Poll for messages” at the bottom.
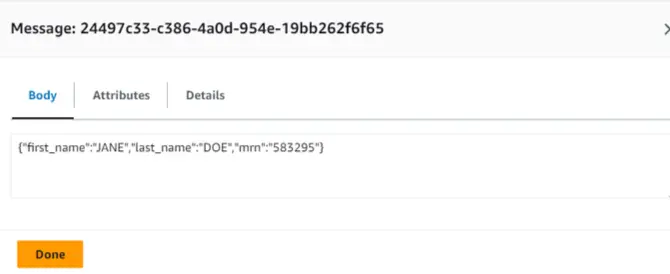
- Success! You’ve successfully routed an HL7 message to AWS SQS Service.
Conclusion
HL7 is only one example of a data format you can route to SQS with Mirth Connect. Once in SQS, the possibilities are endless. The data can be integrated with other AWS services such as AWS Lambda for serverless processing, Amazon S3 for durable storage, or Amazon DynamoDB for fast and flexible NoSQL database services, facilitating complex healthcare applications like patient monitoring systems, electronic health records (EHR) management, and real-time alerting for critical care scenarios.
Have questions or need help working with AWS or Mirth Connect?
READING DONE